
This guide covers the candidate interface for technical interviews, including lobby setup, code editor usage, diagram tools, screen sharing, and troubleshooting.
Lobby
Before the interview starts, candidates wait in a lobby where they can test audio and video equipment.
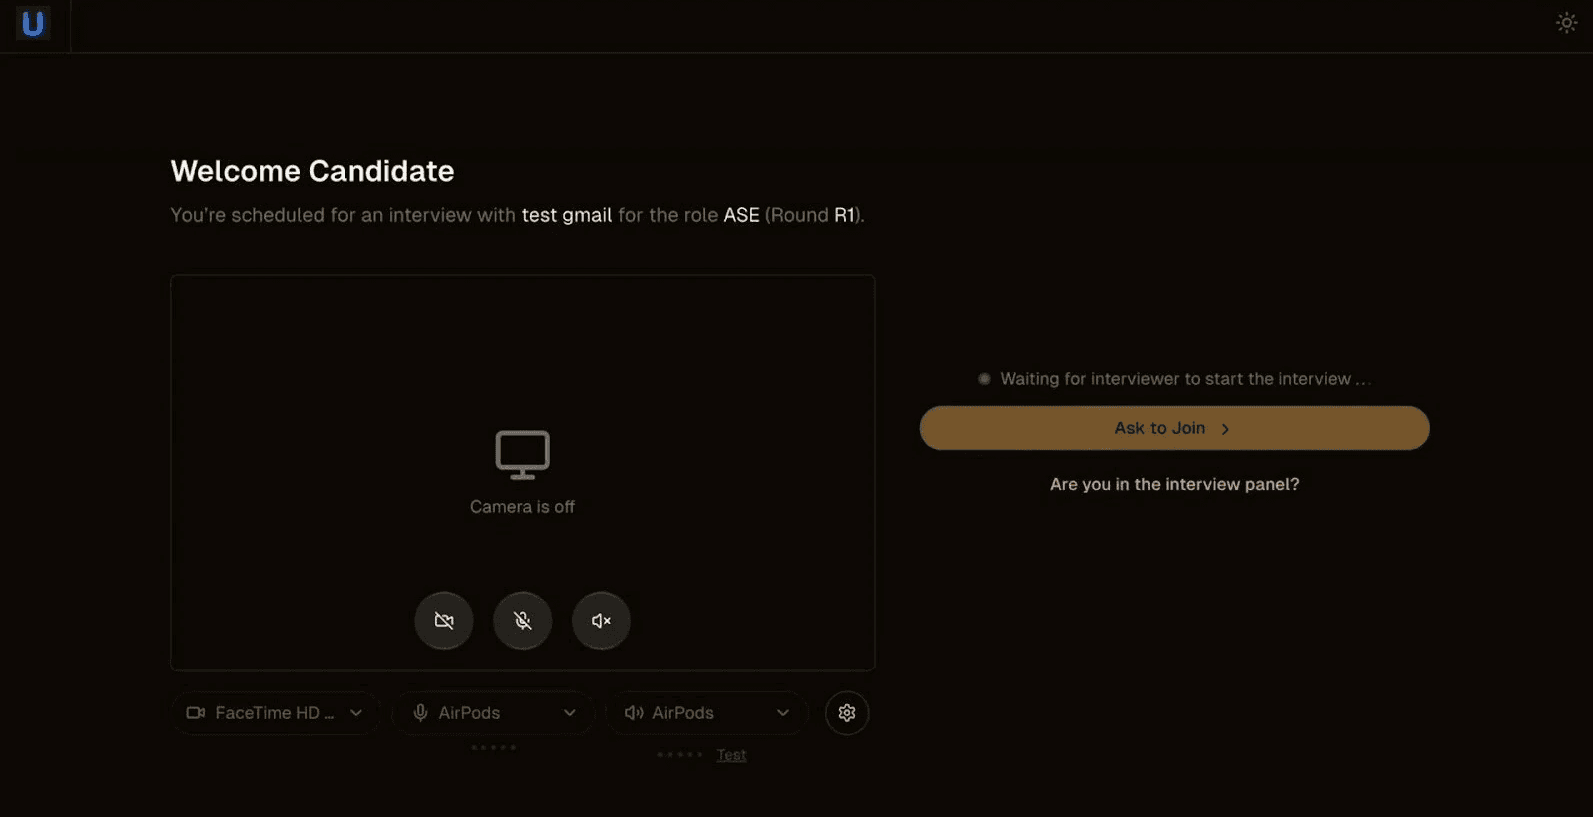
Candidate lobby with device setup
Initial setup
Open the interview link sent by the recruiter / on the calendar invite
Browser prompts for camera and microphone permissions
Grant permissions to proceed
Lobby screen displays with device controls
Device controls
Three control buttons appear in the preview area:
Camera toggle: Enable or disable video feed
Microphone toggle: Mute or unmute audio
Speaker toggle: Control audio output
Device selection
Dropdown menus at the bottom allow device selection:
Camera: Choose which camera to use (e.g., FaceTime HD, external webcam)
Microphone: Select audio input device (e.g., AirPods, built-in mic)
Speakers: Select audio output device
Testing equipment
Audio test: Click Test button to hear a sample sound
Video preview: Check camera feed in preview window
Settings: Click gear icon for advanced options
Joining the interview
"Ask to join" gets enabled once interviewer joins the interview room
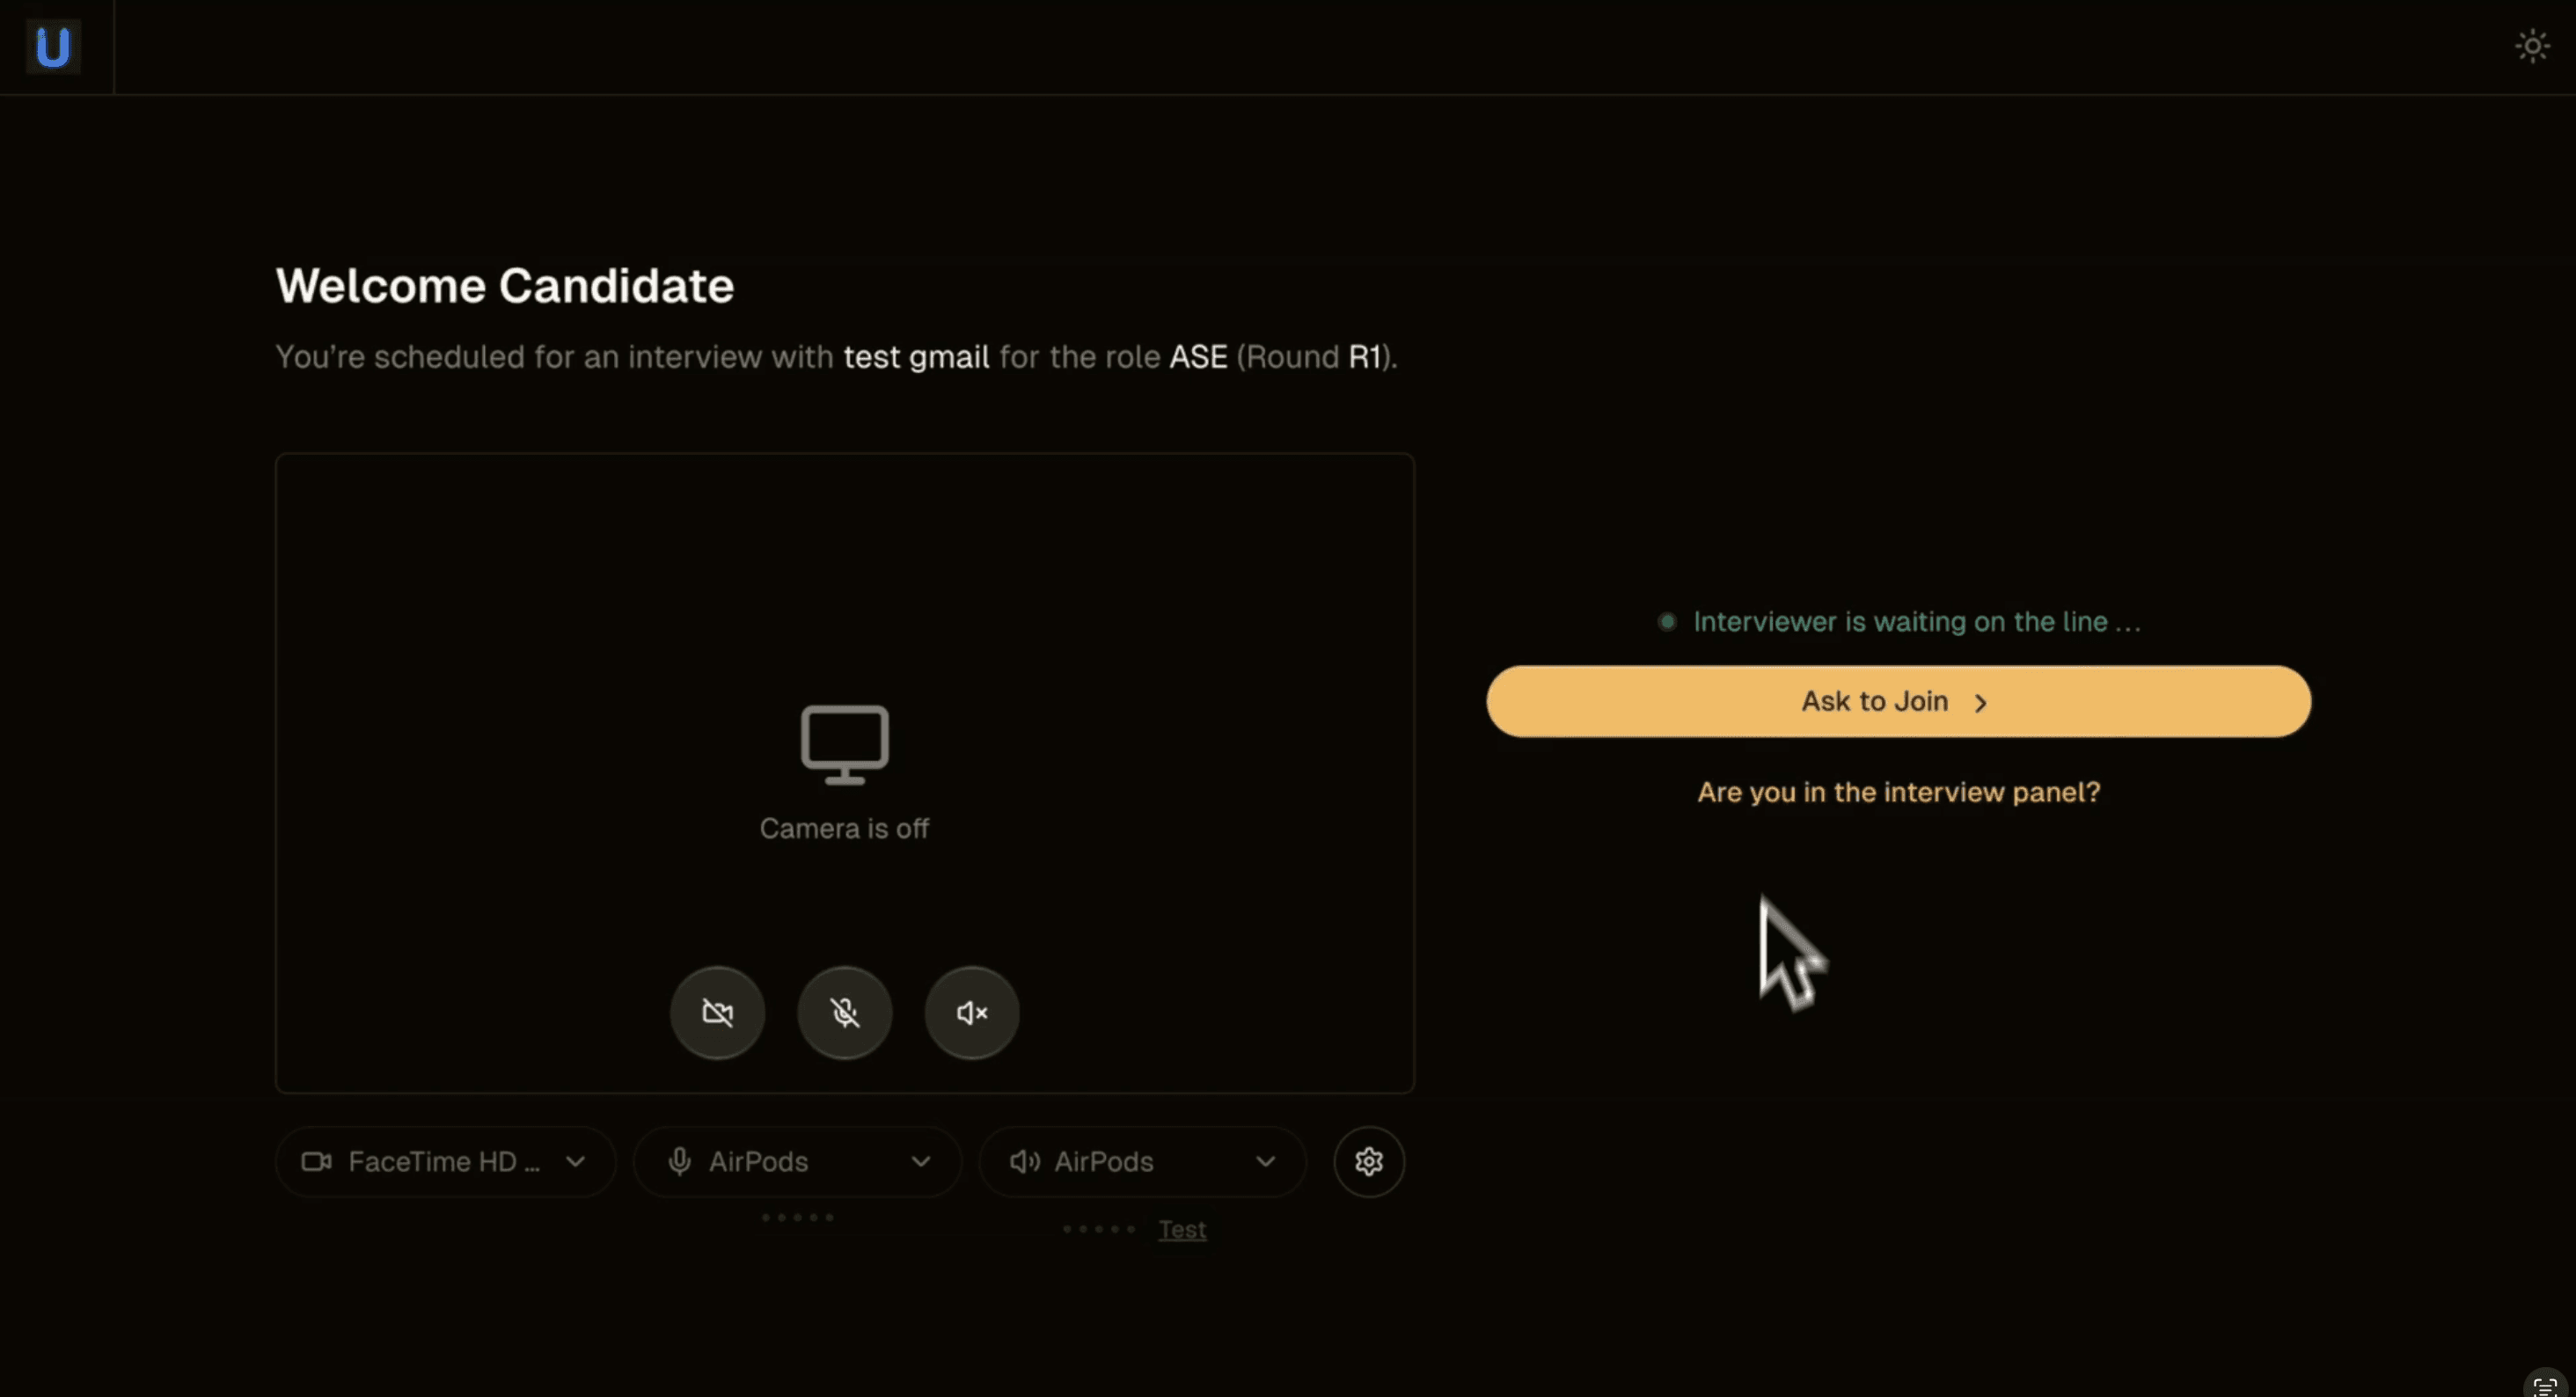
Ask to join enabled once interviewer joins the interview room
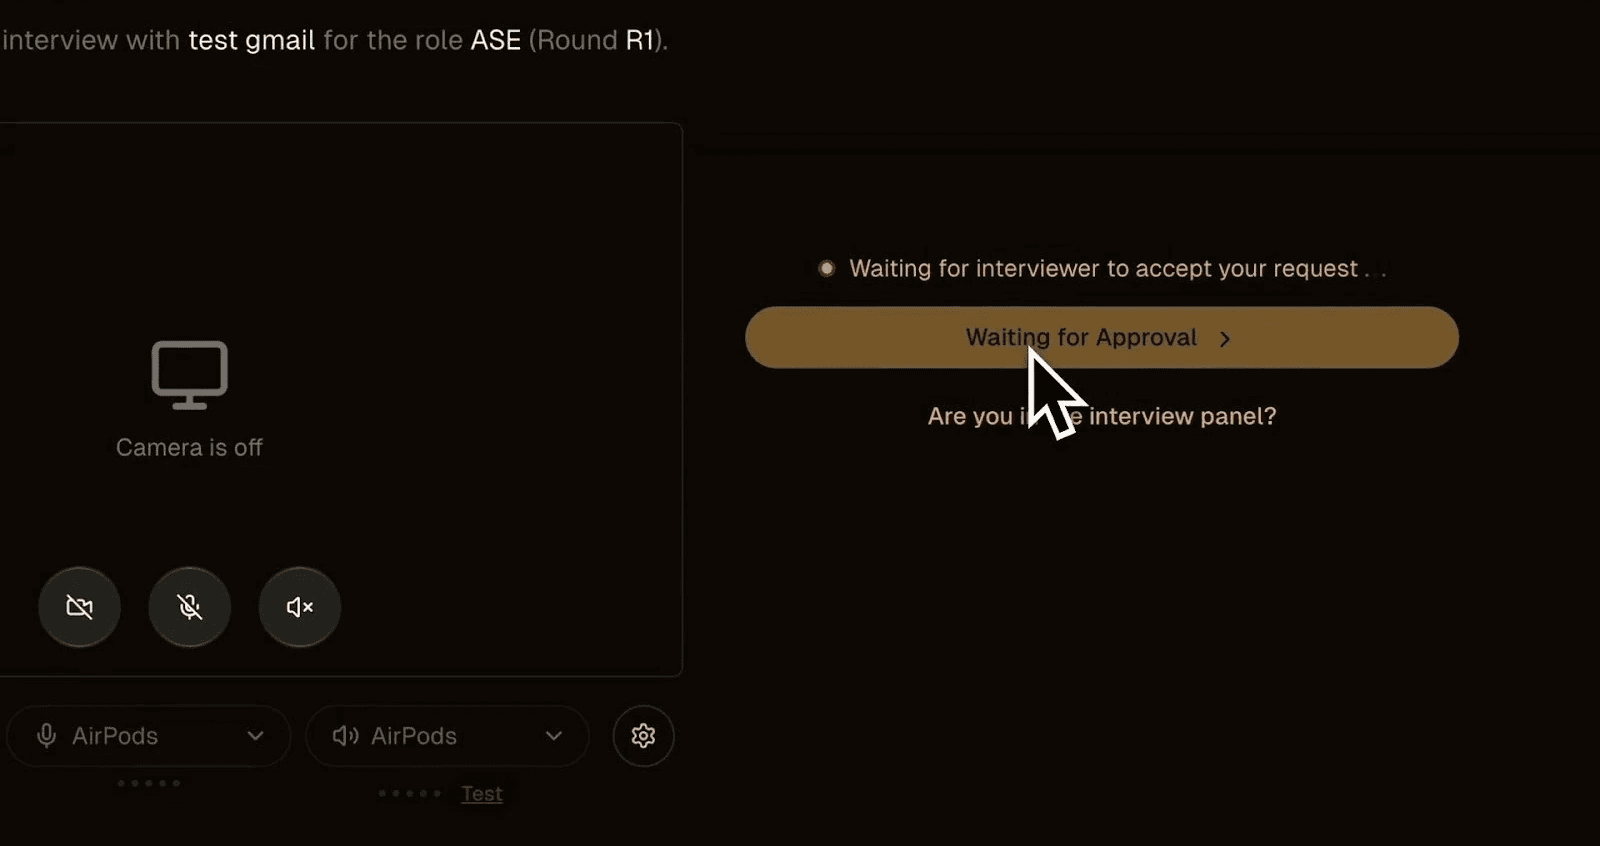
Waiting for interviewer approval
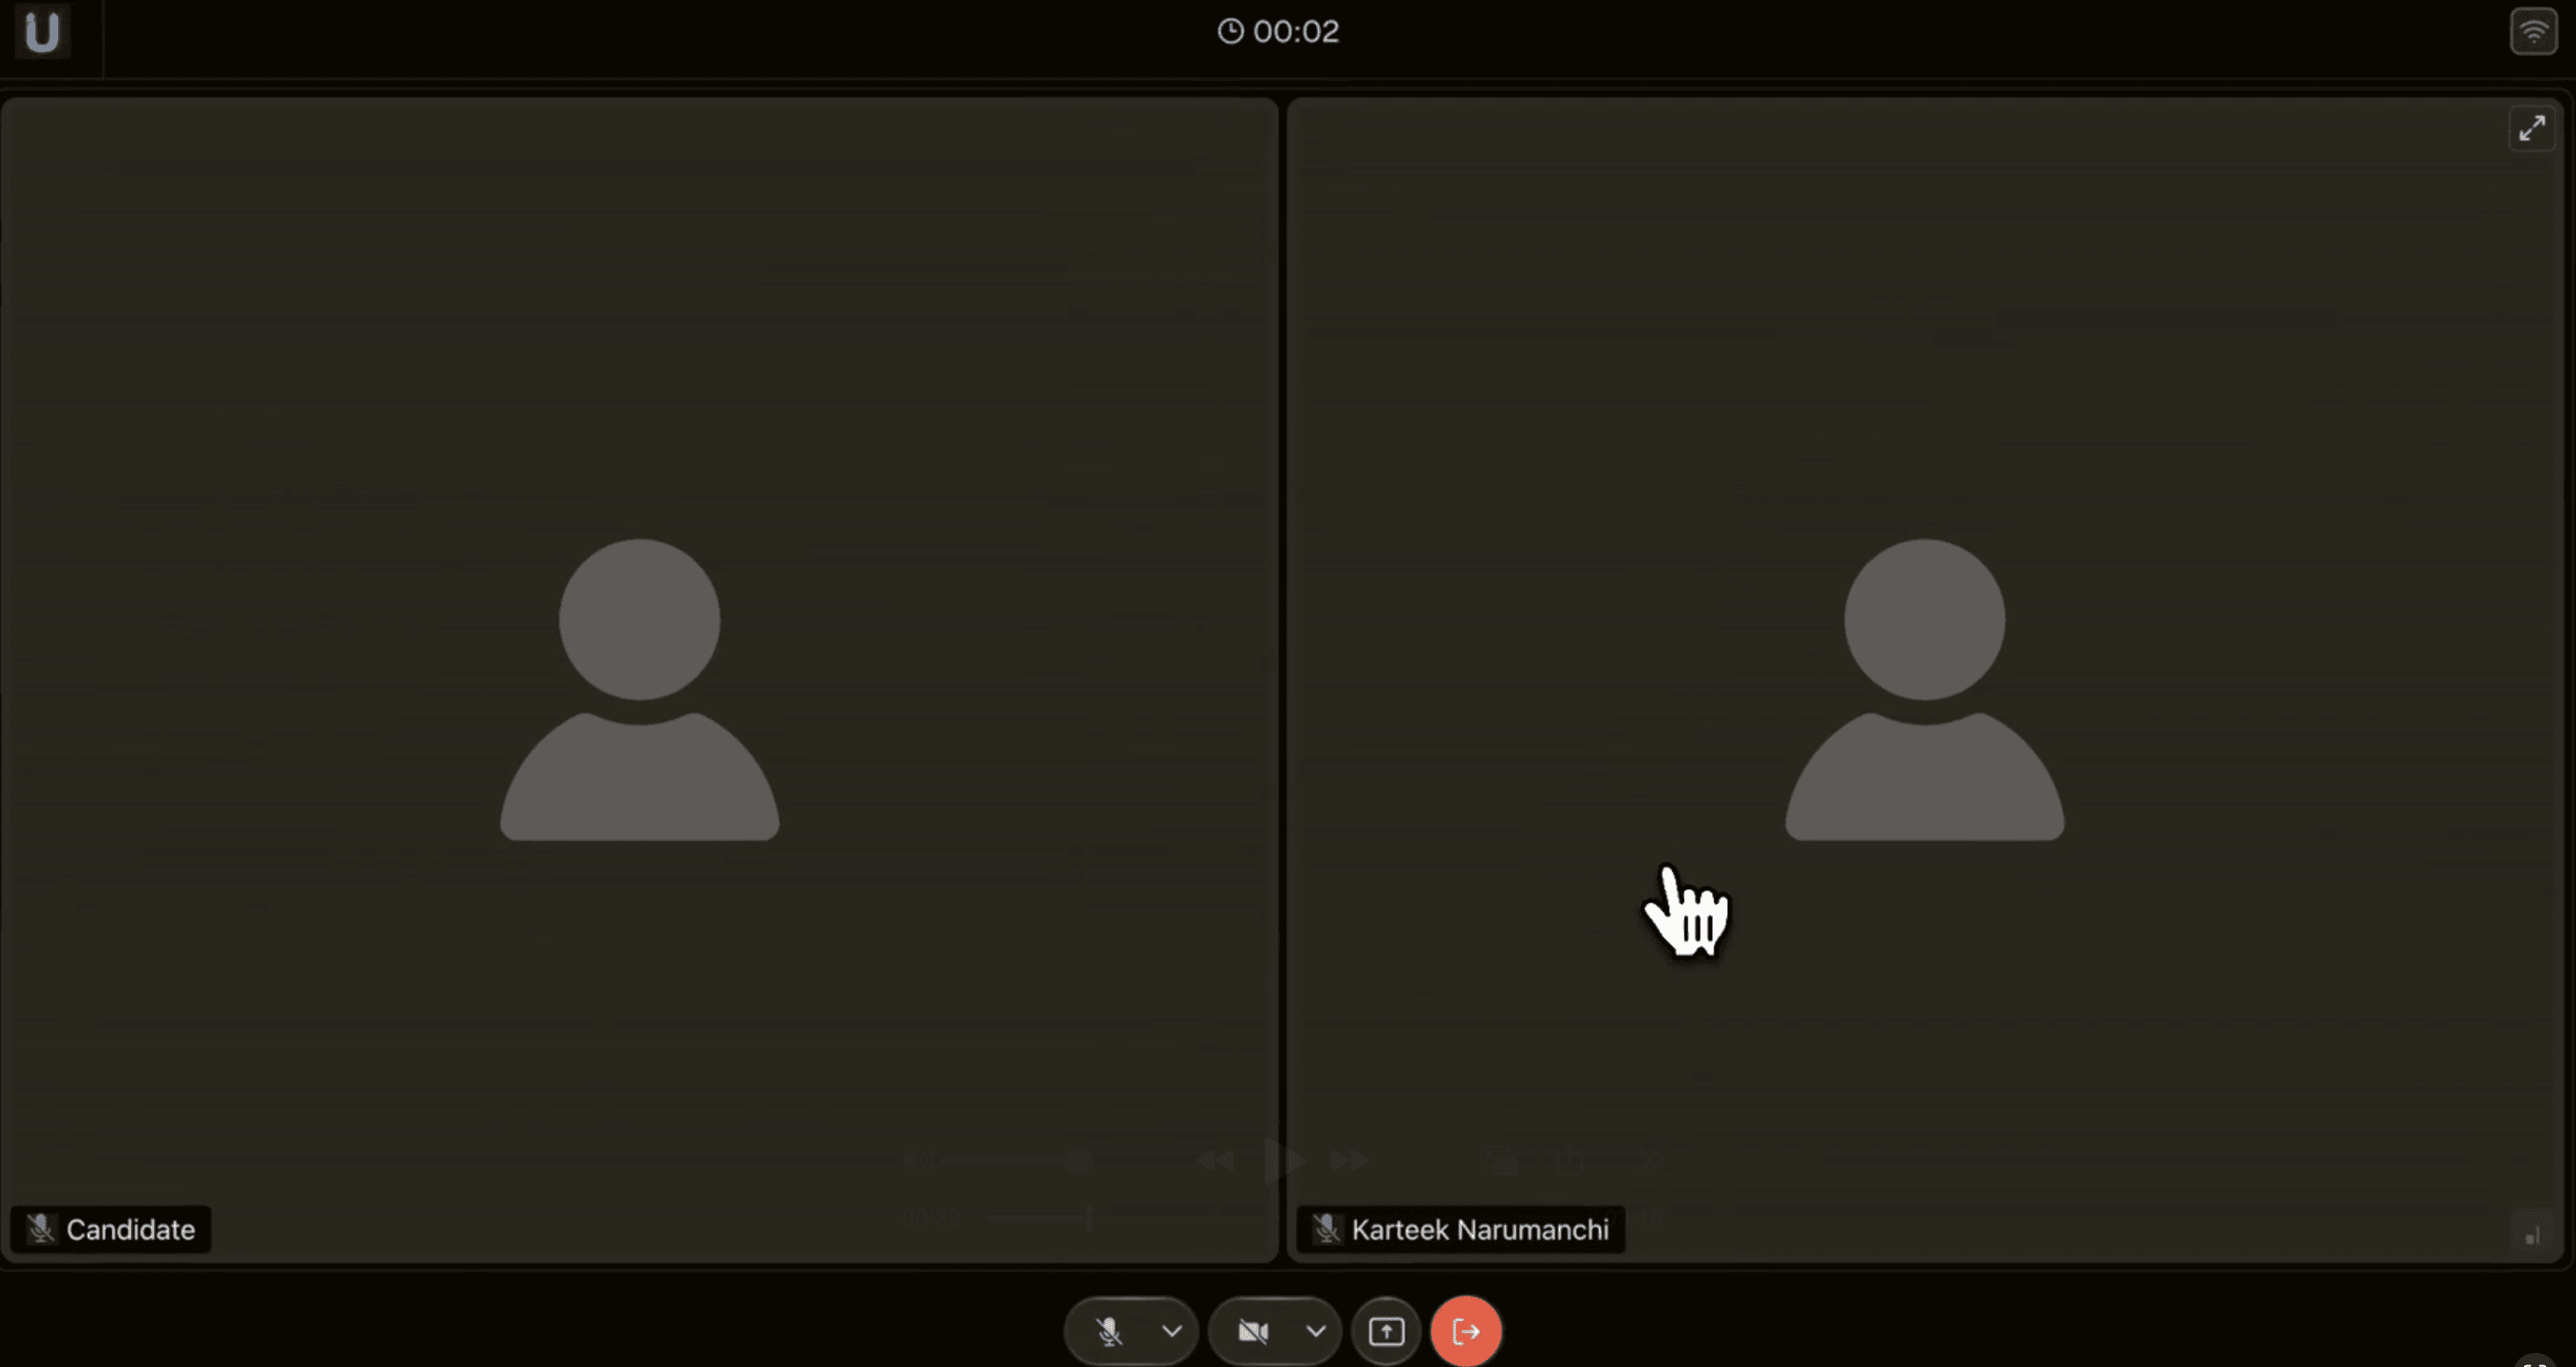
Candidate and interviewer video feeds upon joining the interview room
Click "Ask to Join" button when ready
Status changes to "Waiting for Approval"
Interviewer receives notification and admits candidate
Interview room opens automatically when approved
Code Editor
Code editor is available within the interview room. You don't need to switch to a different IDE for the interview. It will open up as soon as interviewer starts a coding problem

Code editor with problem and test cases
Interface layout
Left sidebar: Problem description and test cases. This is view only for candidates
Center panel: Code editor with syntax highlighting. Candidates can edit / write code jere
Bottom panel: Input/Output tabs for testing
Top bar: File name, language selector, settings
Running code
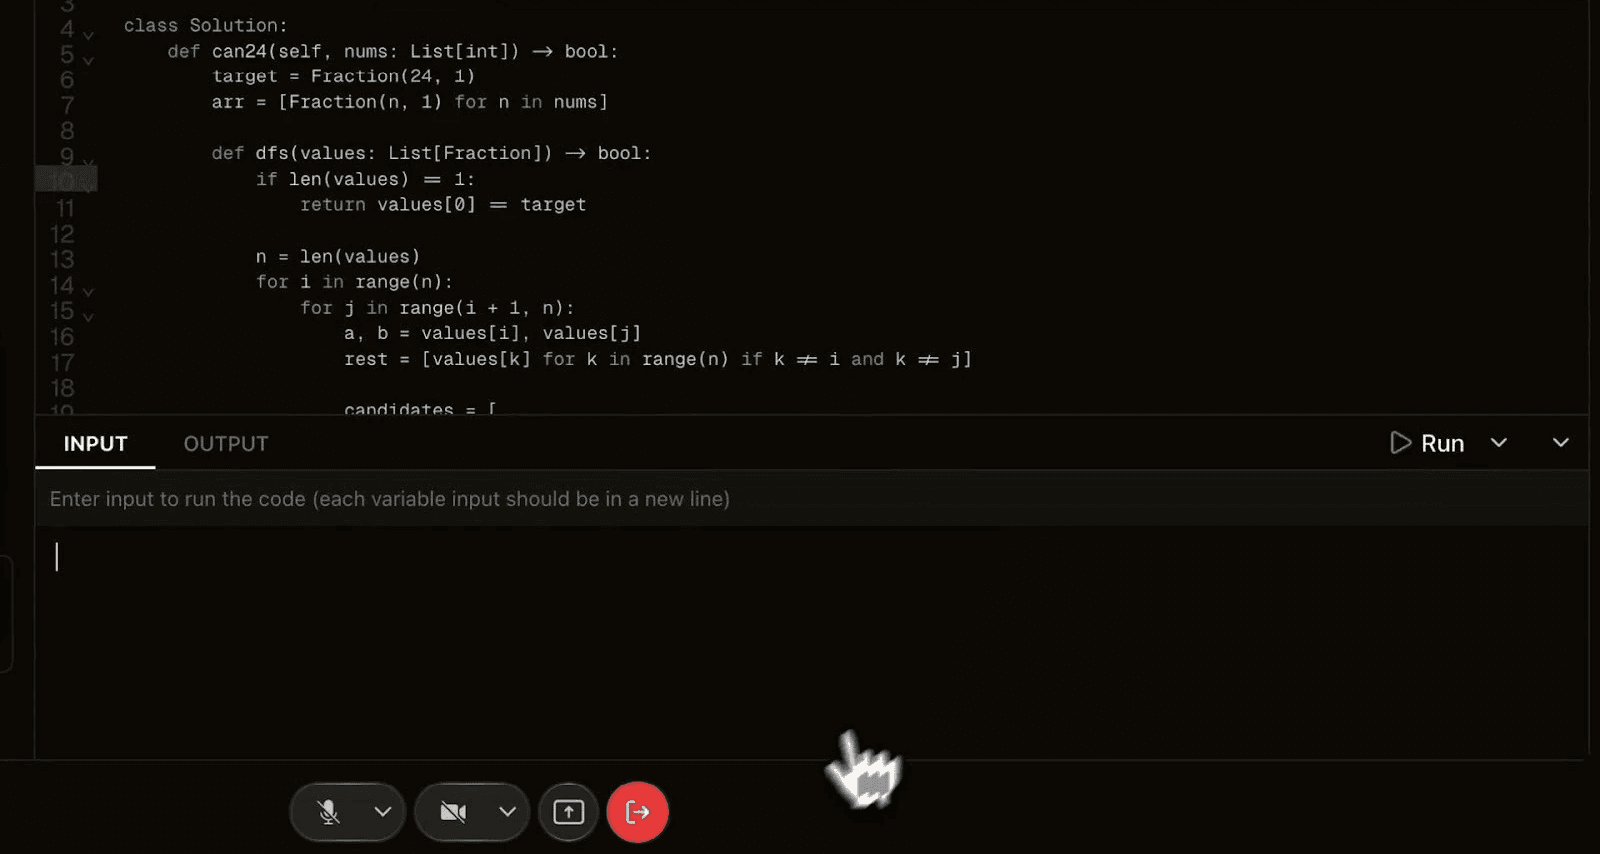
Input panel for test execution
Click INPUT tab in bottom panel
Enter test input (each variable on new line as instructed)
Click green "Run" button in top right
Results appear in OUTPUT tab
Test cases
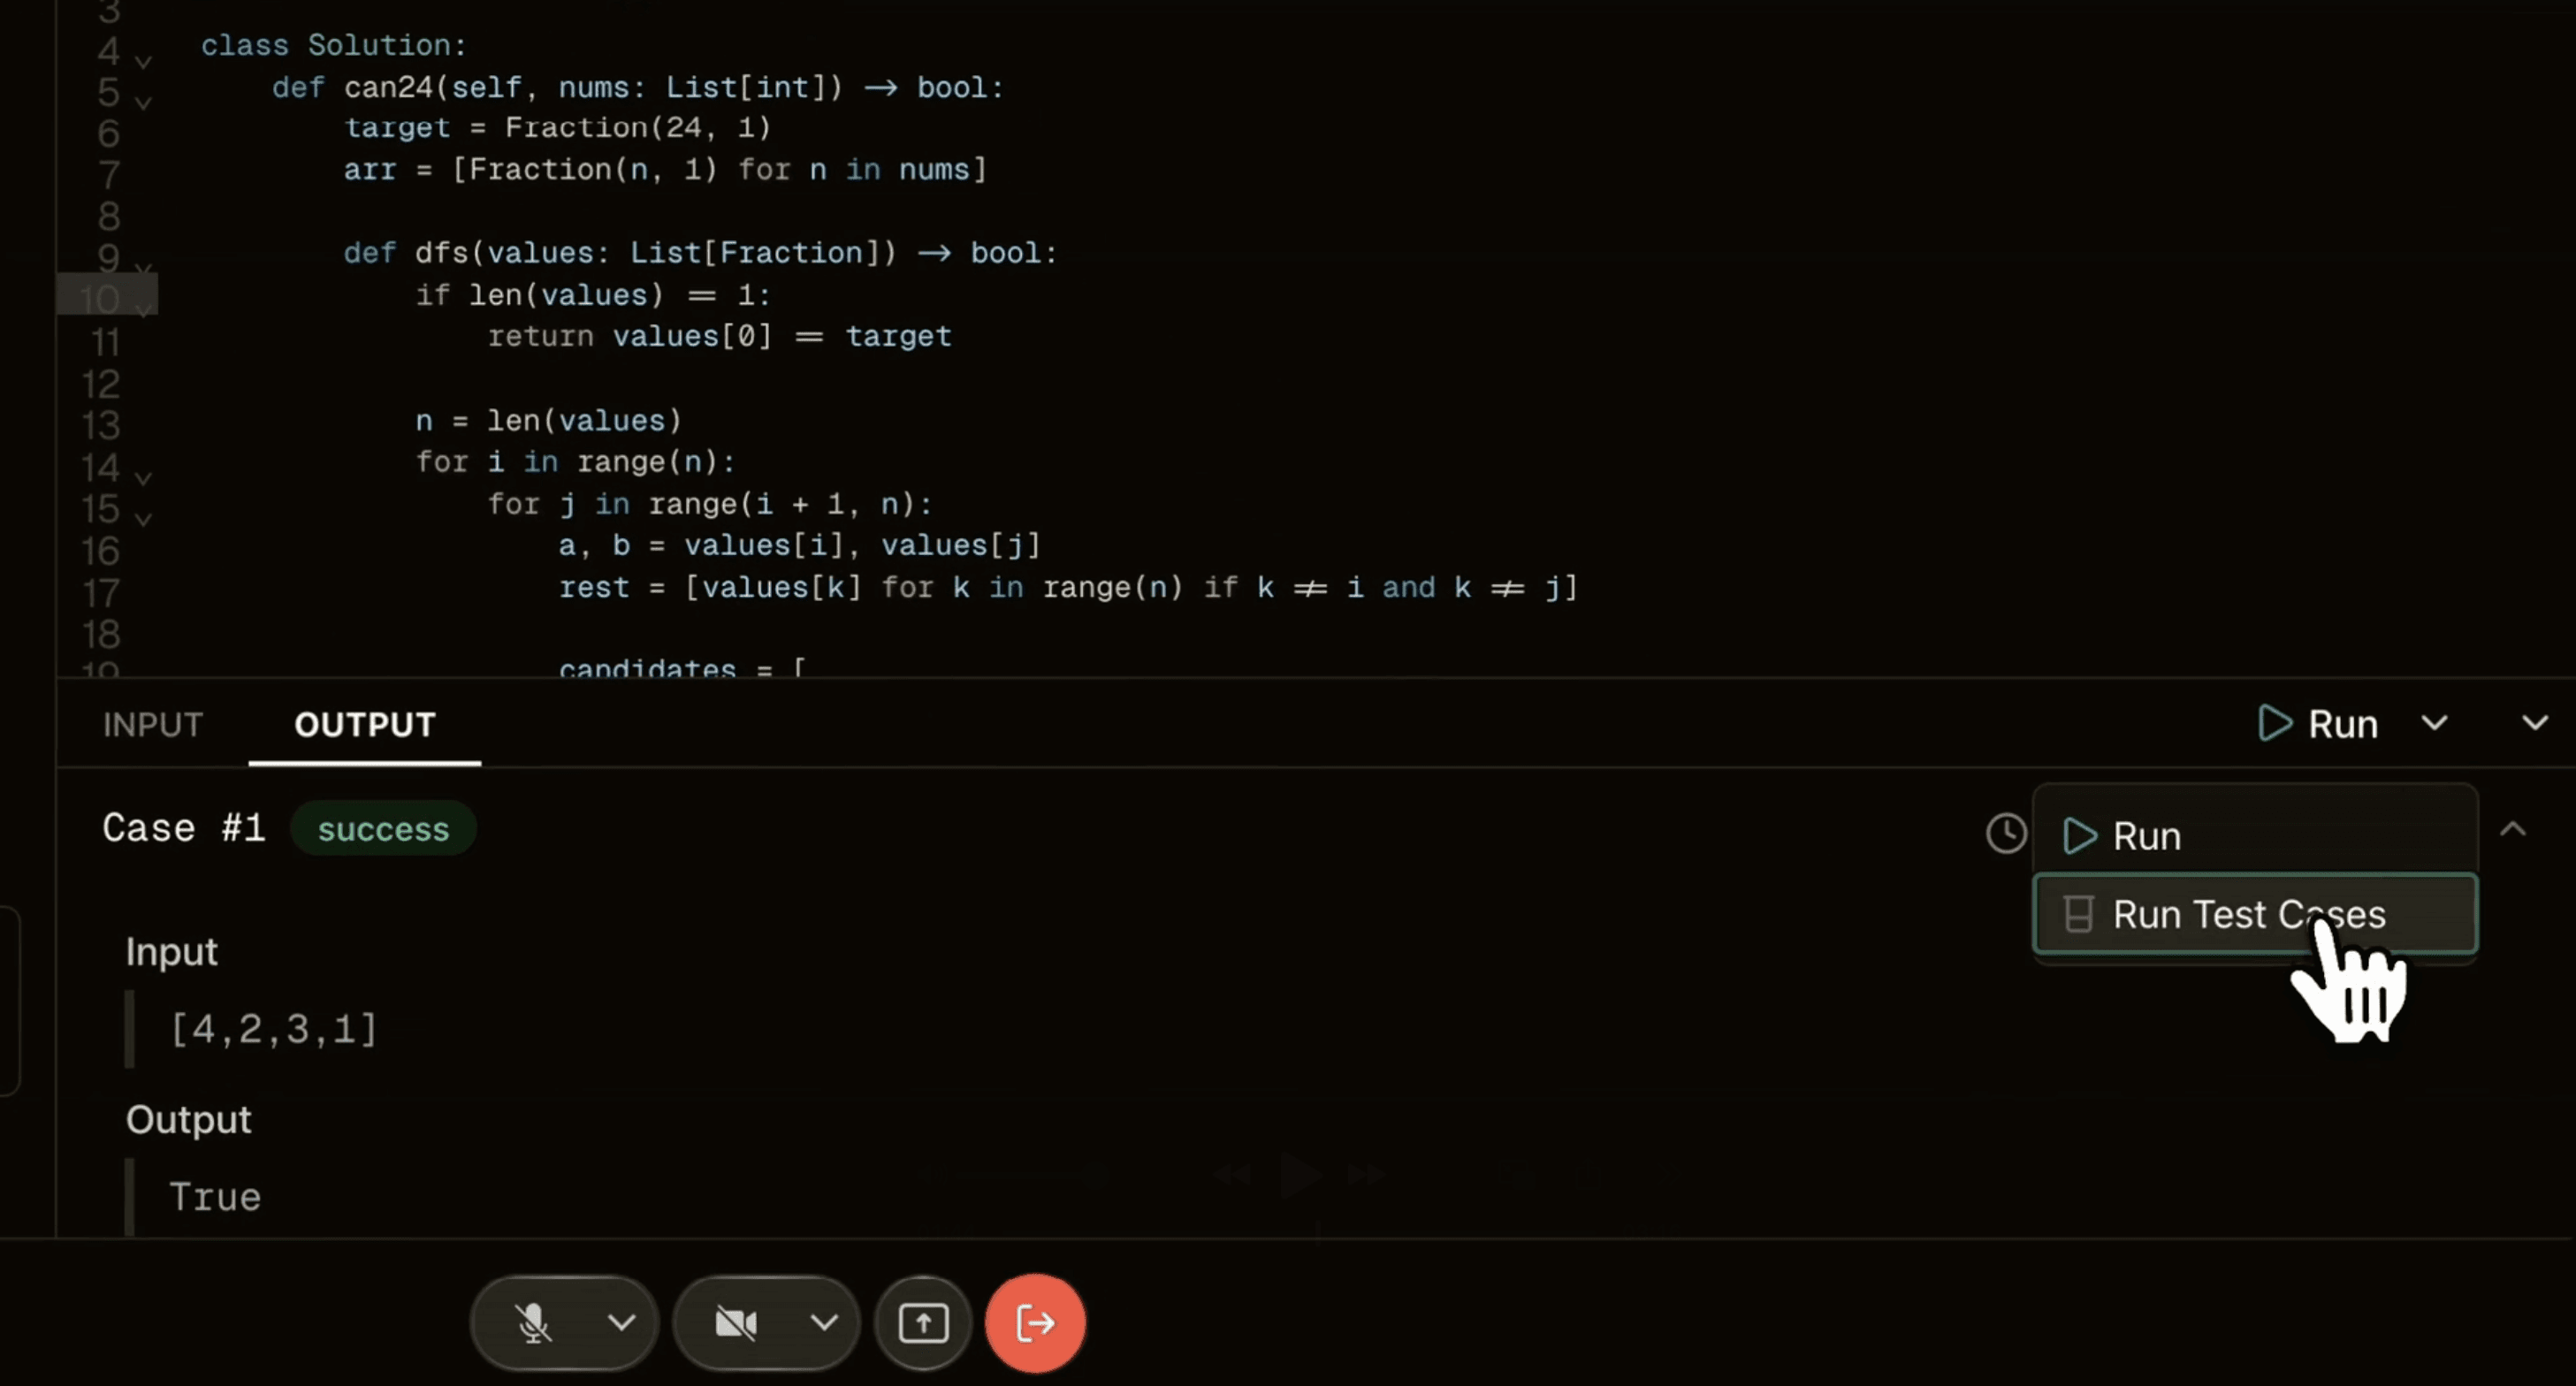
Run test cases
Pre-defined test cases (if available) appear in left sidebar with input values for each test case and expected output. Running them will show success/failure against each case
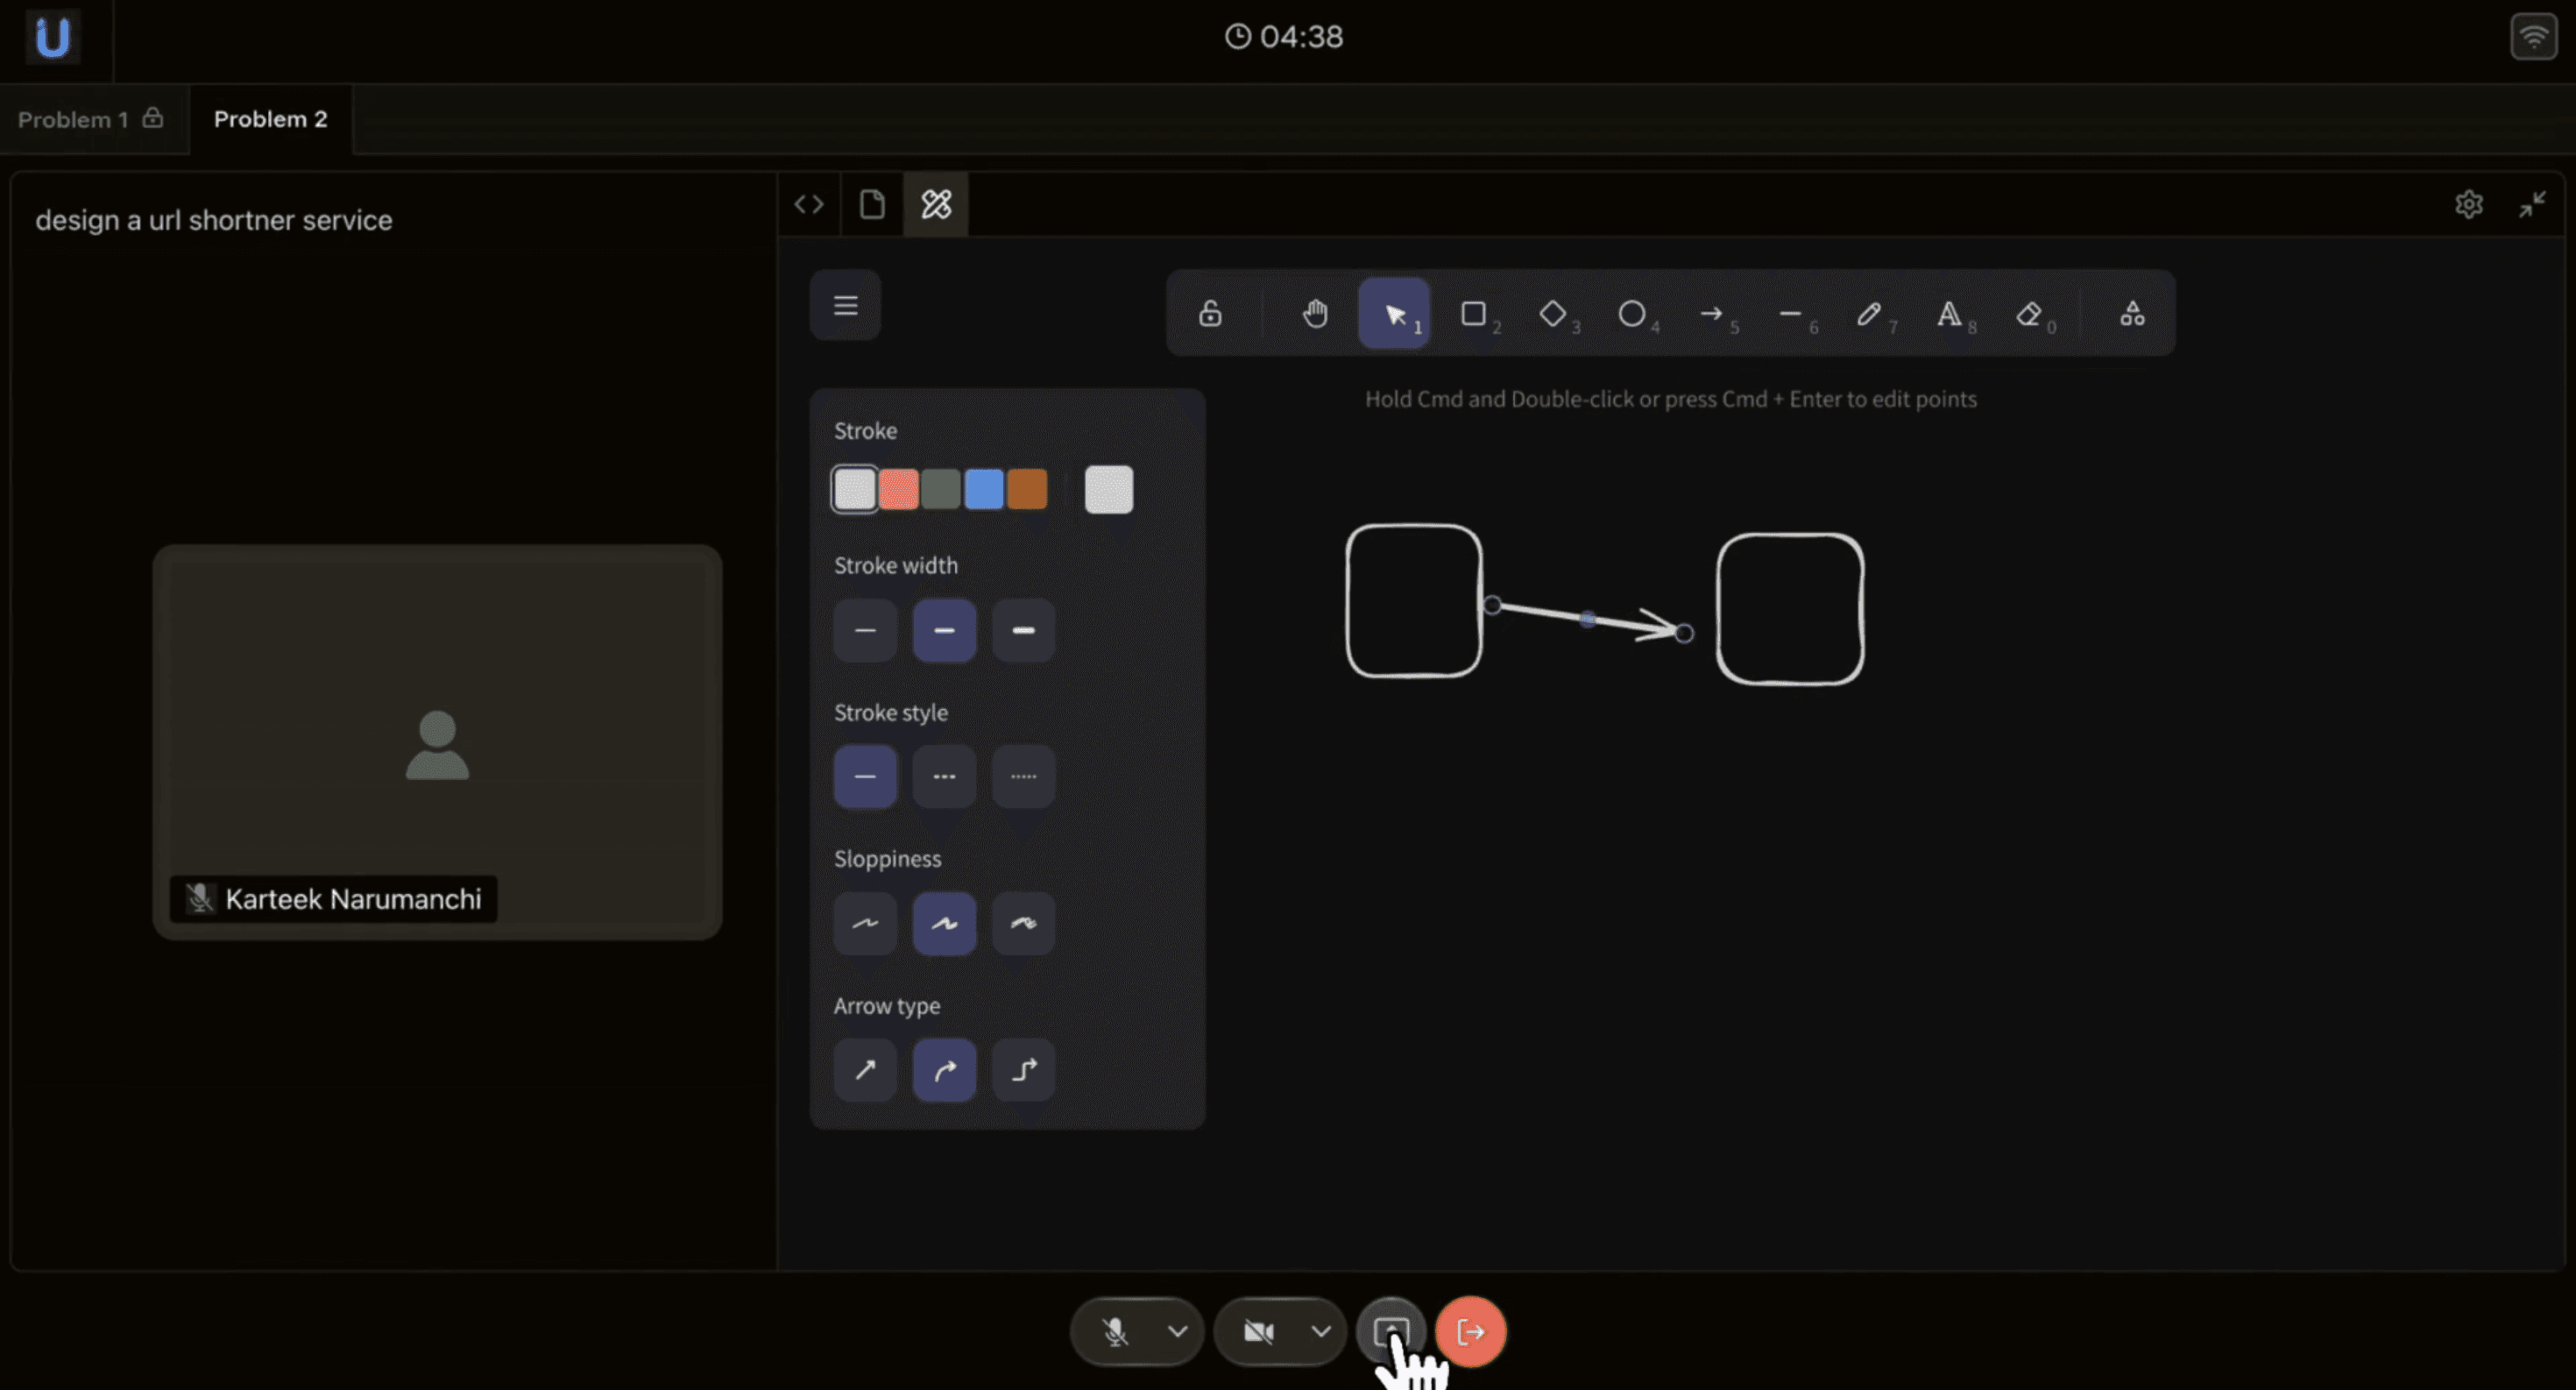
Diagram Editor
The diagram editor is used for system design questions, architecture discussions, and visual problem-solving.
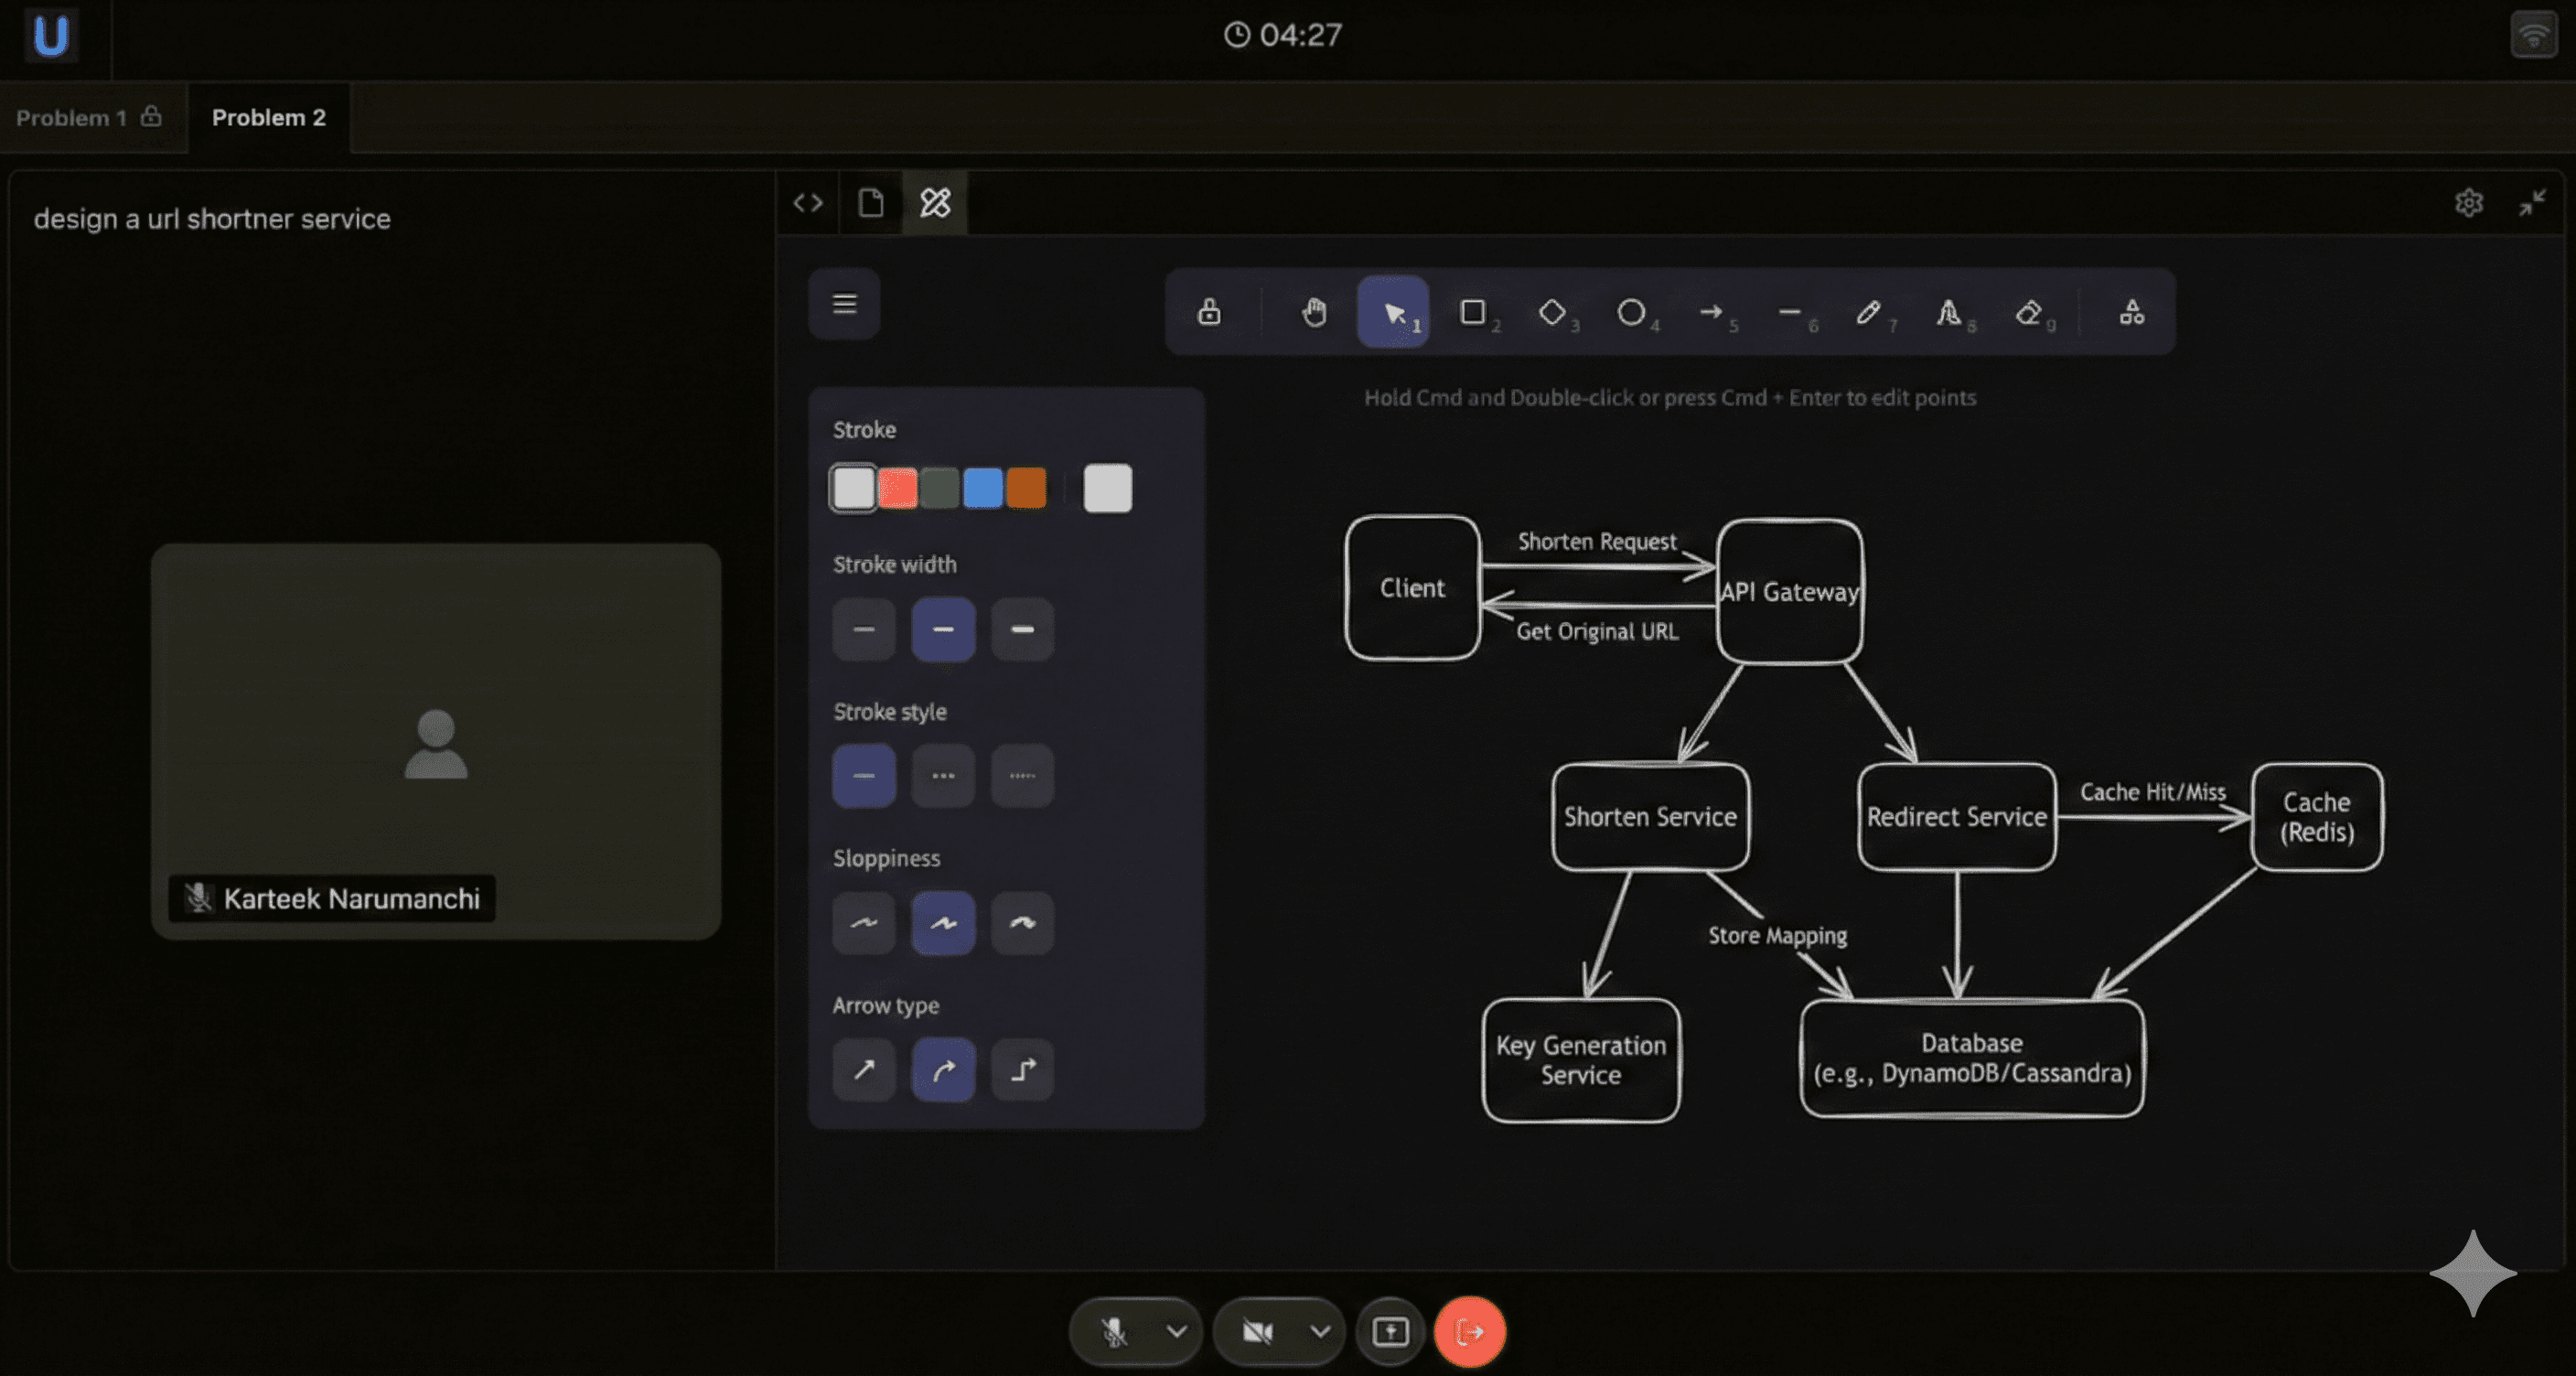
Diagram editor with drawing tools
Screen Share
Screen sharing allows candidates to show their local development environment, browser, or other applications to the interviewer.
Starting screen share
Screenshare icon
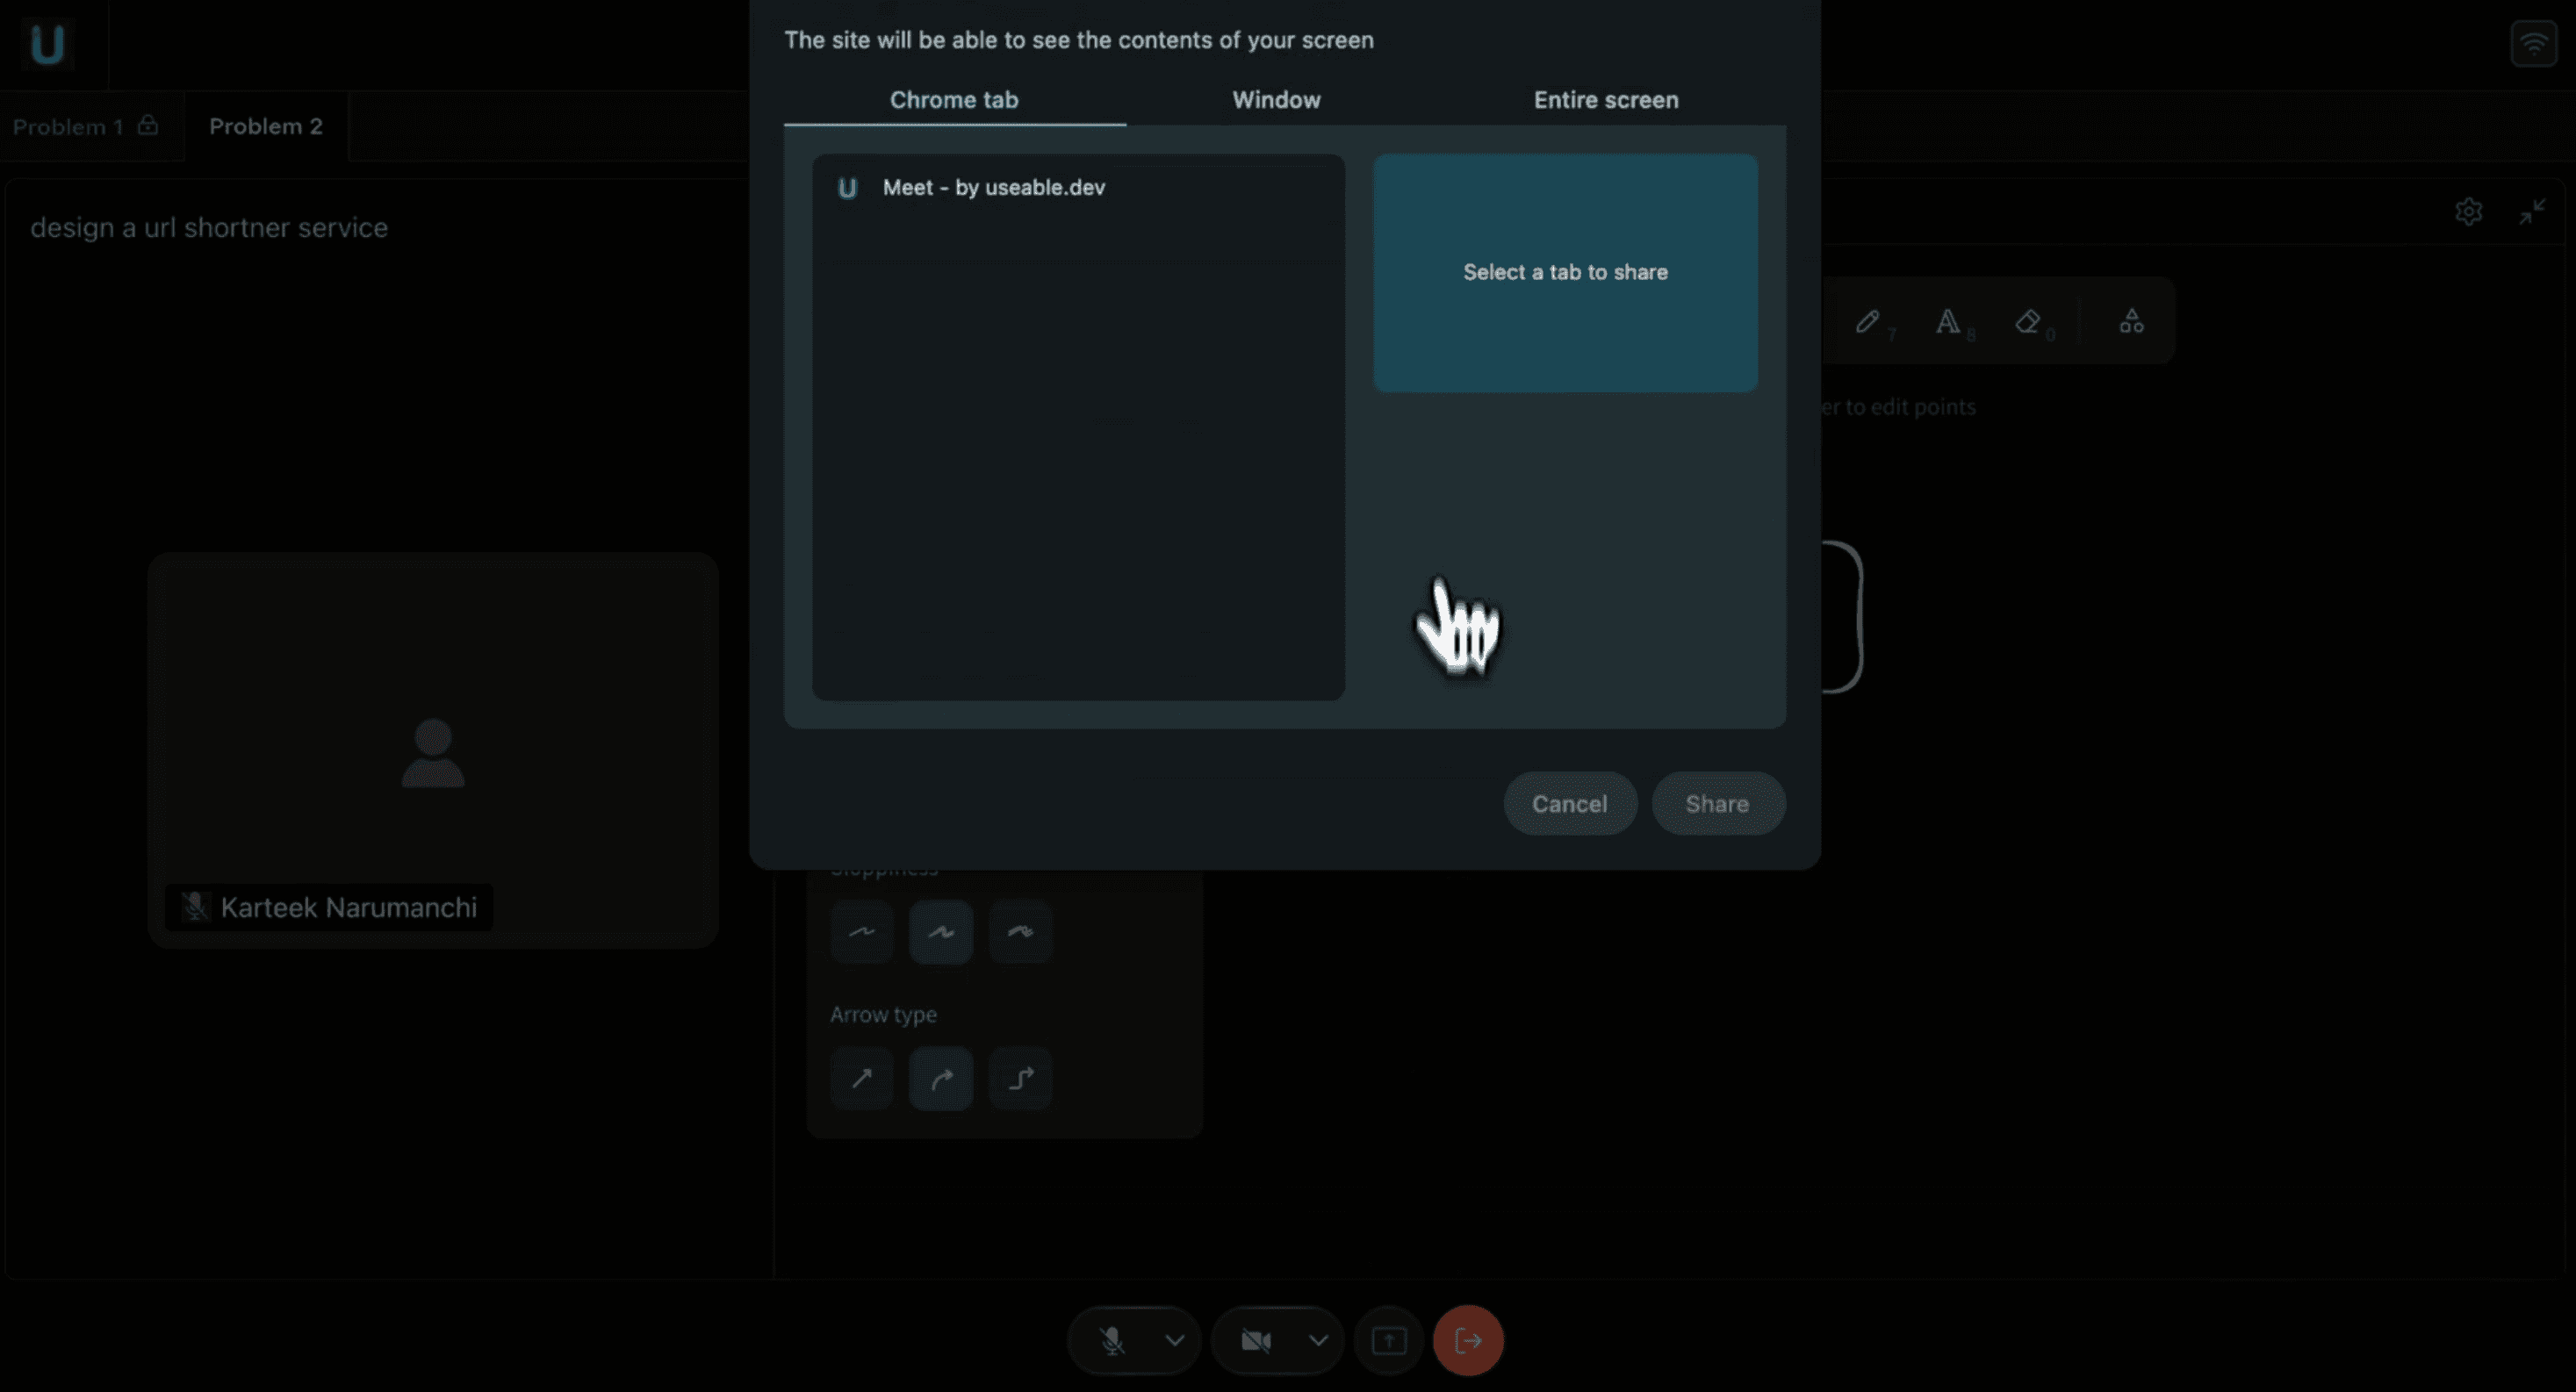
Click screen share icon in bottom control bar (monitor icon)
Browser dialog appears showing available screens/windows
Choose what to share: Entire Screen, Application Window, or Browser Tab
Click Share button to begin broadcasting
What to share
Screenshare options
Entire Screen: Shows everything on your display
Application Window: Shares specific app (e.g., VS Code, Terminal)
Browser Tab: Shares single browser tab content
During screen share
Screen share indicator appears (red icon or notification)
Interviewer sees your shared content in their interface
You can still see and use your screen normally
Stopping screen share
Click screen share icon again (now highlighted)
Or click Stop Sharing in browser notification bar
Screen share ends and icon returns to normal state
Troubleshooting
The platform includes diagnostic tools to help resolve audio, video, and connection issues during interviews.
Accessing troubleshooting
Clicking on settings icon
Click settings icon (gear) in lobby or during interview
Select Troubleshooting from menu
Diagnostic tabs
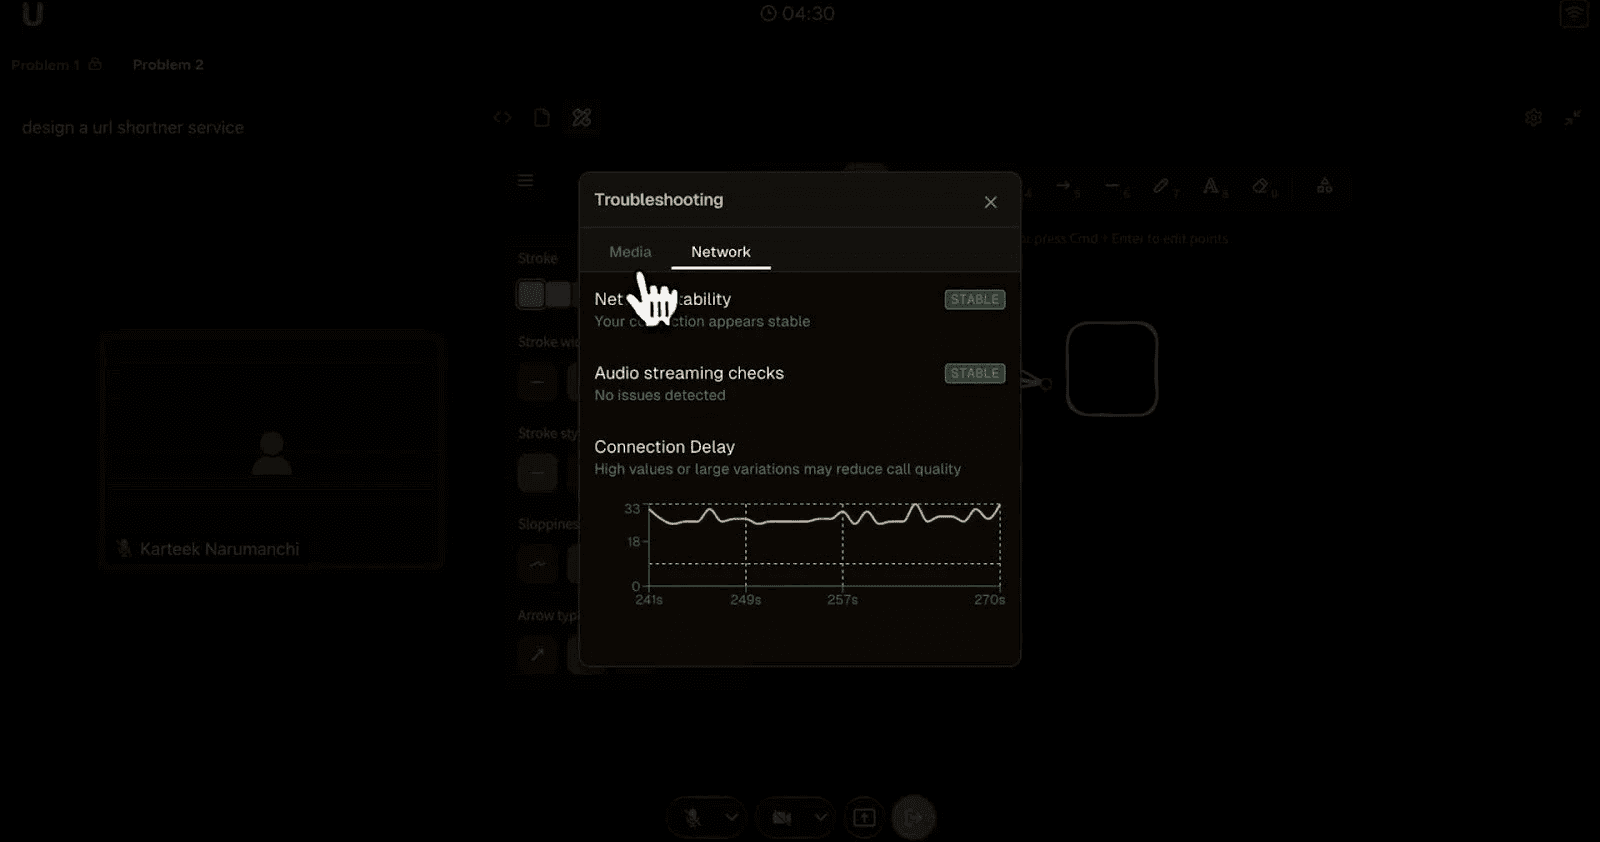
Troubleshooting panel with network diagnostics
Two tabs provide different diagnostic information:
Media: Audio and video device status
Network: Connection quality and bandwidth metrics
A complete demo of the candidate experience is available here

Get started with Fairground in just few mins.
Plug and Play. Works well with your existing ATS.
100 Free Credits